add-circle-bold add-circle add-square add alarm-bell-1 alert-diamond analytics-pie-2 archive archive arrow-down-1 arrow-down-2 arrow-left-1 arrow-right-1 arrow-up-1 attachment-1 bin-paper-1 book-star button-record check-1 check-circle-1 close close-quote close cog-1 cog common-file-stack copy-paste credit-card-1 diagram-fall-down disable time-clock-midnight download-thick-bottom drawer-send envelope-letter envelope-letter expand-6 expand-6 file-code filter-1 floppy-disk flying-insect-honey folder-file-1 headphones-customer-support hierarchy-9 hyperlink-2 information-circle keyboard-arrow-down keyboard-arrow-up layout-module-1 list-bullets lock-2 lock-unlock-1 love-it messages-bubble-square move-to-top multiple-circle multiple-neutral-1 multiple-users-1 navigation-menu-horizontal navigation-menu network-browser open-quote pencil-1 pencil-write pencil-1 print-text rating-star rating-star remove-circle remove-square-1 search send-email-1 shield-warning single-neutral-actions single-neutral smiley-sad-1 smiley-unhappy smiley-indifferent smiley-smile-1_1 smiley-happy smiley-sad-1 smiley-unhappy smiley-indifferent smiley-happy smiley-thrilled social-media-twitter synchronize-arrows-1 tags-double ticket-1 ticket-1 time-clock-circle undo view-1 view-off view wench

Manually Adding a Contact

There are different ways on how we can manually add a contact inside your Hitched account. 

Please keep in mind: You are JUST ADDING THE CONTACT. This DOES NOT implement the contact into any AUTOMATION or campaigns.

If you are trying to manually add an inquiry and you would like them to receive the correct campaigns, please CLICK HERE to follow the correct steps.


Option 1: Opportunities

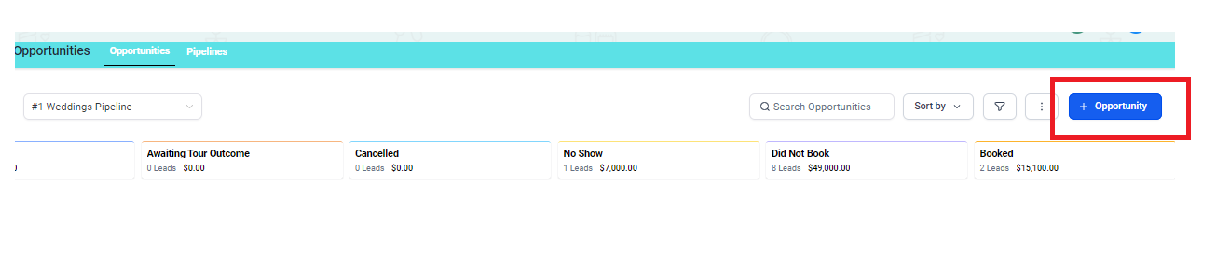
We can add Contact from the Opportunities tab and have a lead card 

  1. Click on the Opportunities Tab Icon.
  2. Click the +Opportunity blue button.


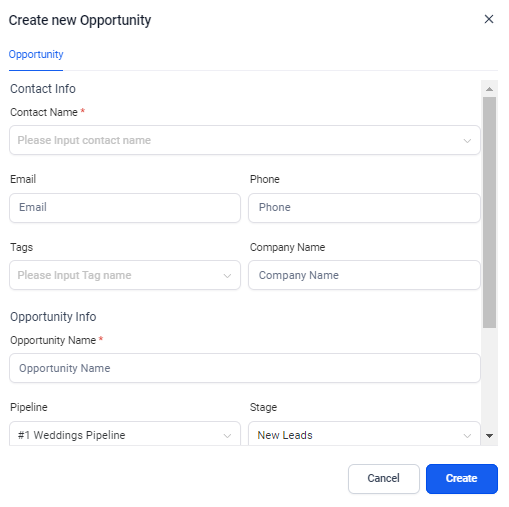
        3. Fill out the information on the pop-up box, (Contact Name, Email, Phone) and click CREATED.


Option 2: Contacts Tab

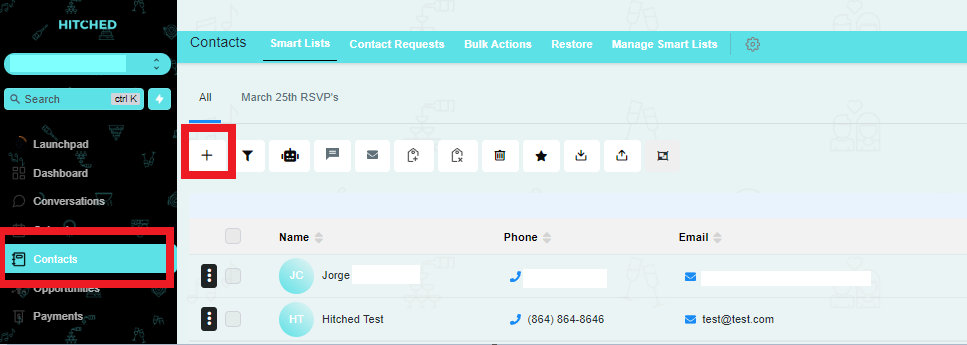
  1. Click on the Contacts Tab, then Contacts/ Smart Contact.
  2. Click on the  “+” icon on the upper left side.


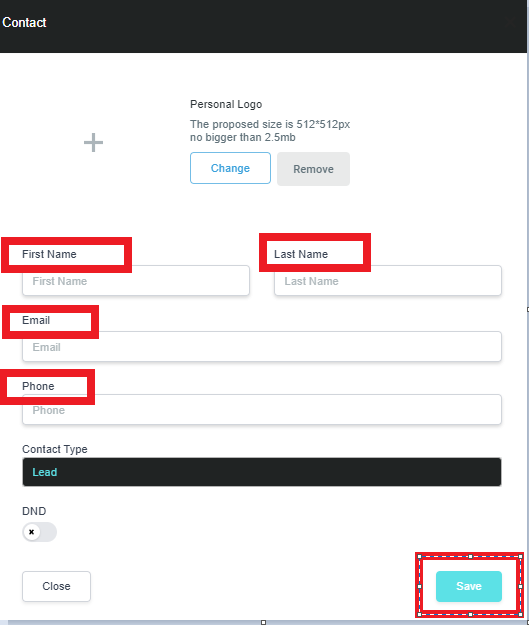
3. Fill out the information (First Name, Last Name, Email, Phone), then click SAVE.